Create a data element
Workbooks support three element types: control elements, UI elements, and data elements. Data elements are built from Built default datasets. They include tables, pivot tables, and visualizations.
Requirements
-
To create a data element, you must have a creator license and the workbook must be saved to your team or My Documents folder and be in Edit mode.
For more information on obtaining a creator license, reach out to your Client Success Manager or client.success@getbuilt.com.
Data source options
Each workbook can contain multiple elements sourced from a variety of datasets. You can pull in new data sources at any time and are not restricted to a single source per workbook or workbook page.
Upstream changes have an effect on elements
If a data source is modified, any dependent elements may be affected. For example, if Element B uses Element A as a data source, removing a column from Element A will immediately make that column inaccessible for Element B.
Follow the instructions in the next section to create a data element from a new source, a source already in use in the workbook, or an existing element.
Create a data element
Create a data element from a new source
Before you start: This action is only available in edit mode. To begin editing, click Edit in the top right corner of the page.
| 1. | Open the workbook's ADD NEW panel.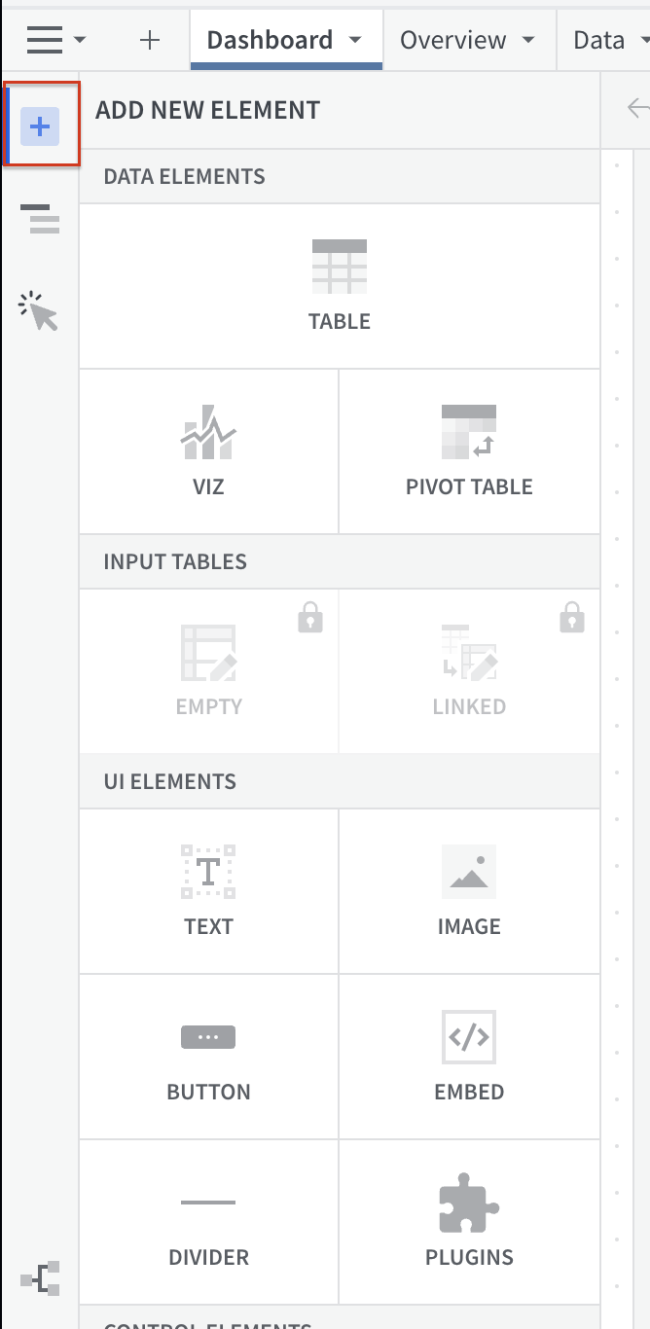 |
| 2. | Under DATA ELEMENTS, click to select your desired element type: TABLE, VIZ, or PIVOT TABLE. |
| 3. | It's time to select a data source. |
Open the NEW tab.
| 4. | Select a source type: TABLES and DATASETS and navigate to the Default Datasets folder in the Built. 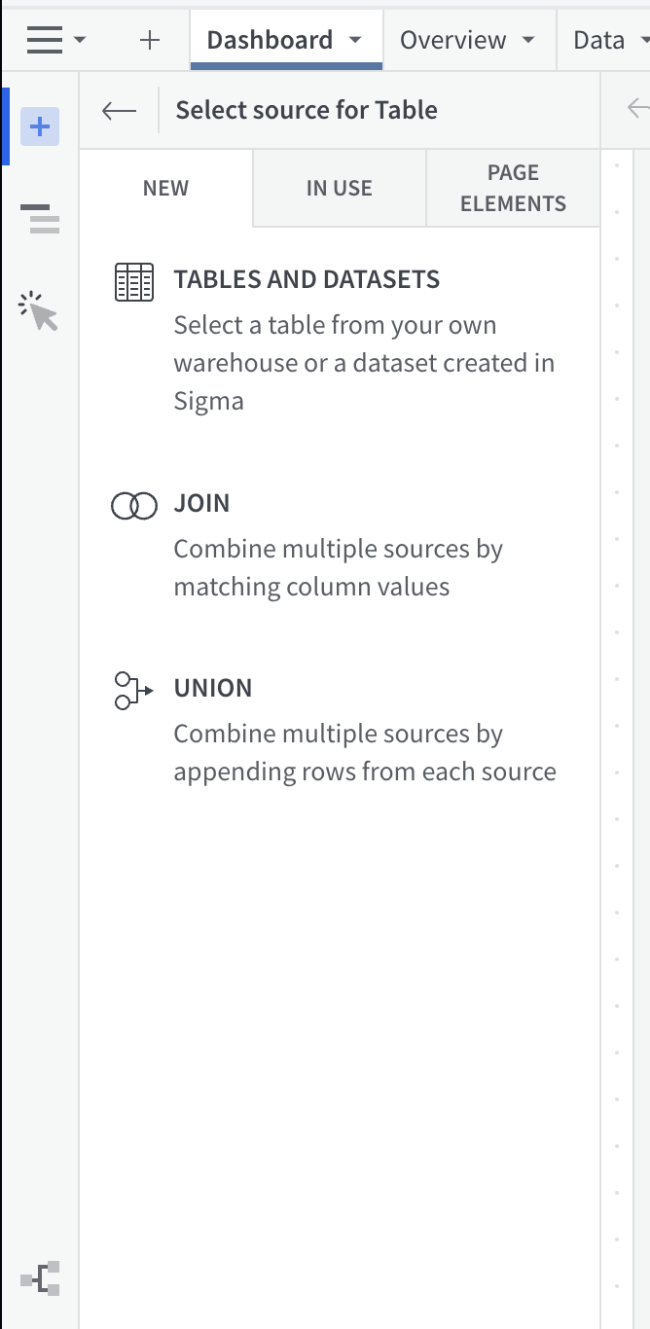 |
| 5. | Follow the prompts on the Select a source page. Then click Done |
Your new element will appear on the page, and the editor panel will open up to the specific element’s configuration view.
You may now interact with your new element using the editor panel, toolbar, or the element itself.
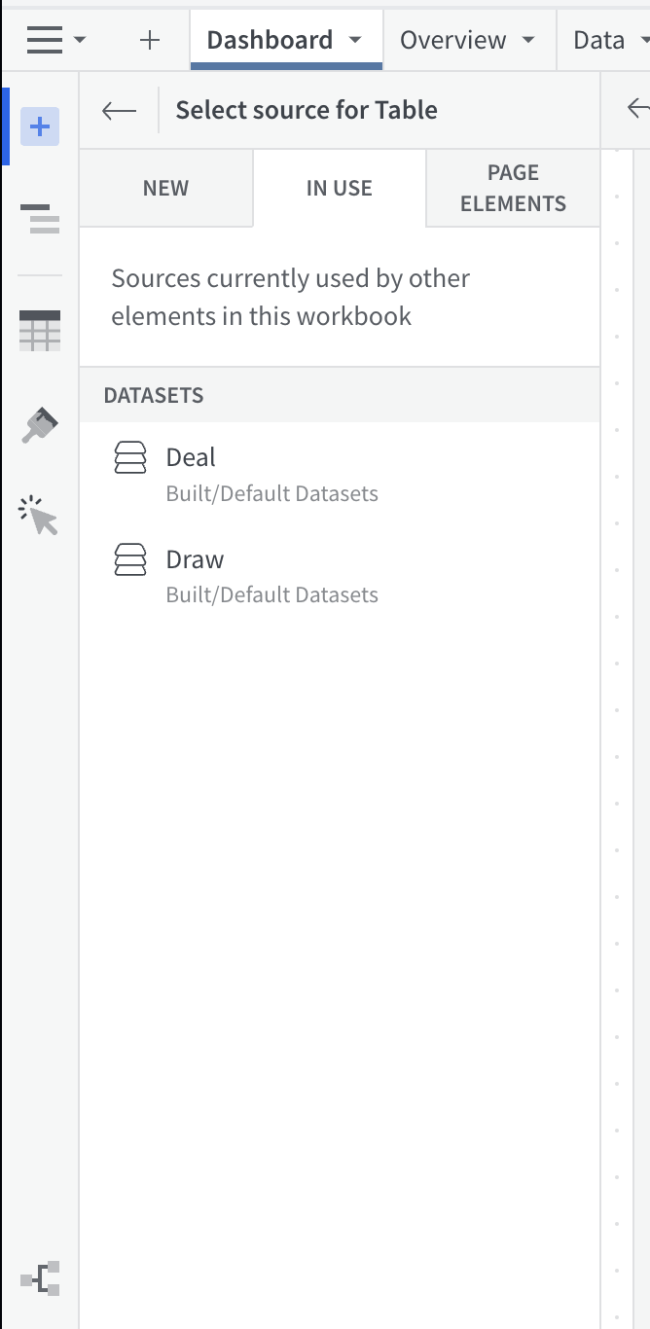
Create a data element from a source already in use in the workbook
Before you start: This action is only available in edit mode. To begin editing, click Edit in the top right corner of the page.
| 1. | Open the workbook's ADD NEW panel. |
| 2. | Under DATA ELEMENTS, click to select your desired element type: TABLE, VIZ, or PIVOT TABLE. |
| 3. | It's time to select a data source. |
Open the IN USE tab.
| 4. | Select a data source from the list. |
Your new element will appear on the page, and the editor panel will open up to the specific element’s configuration view.
You may now interact with your new element using the editor panel, toolbar or the element itself.
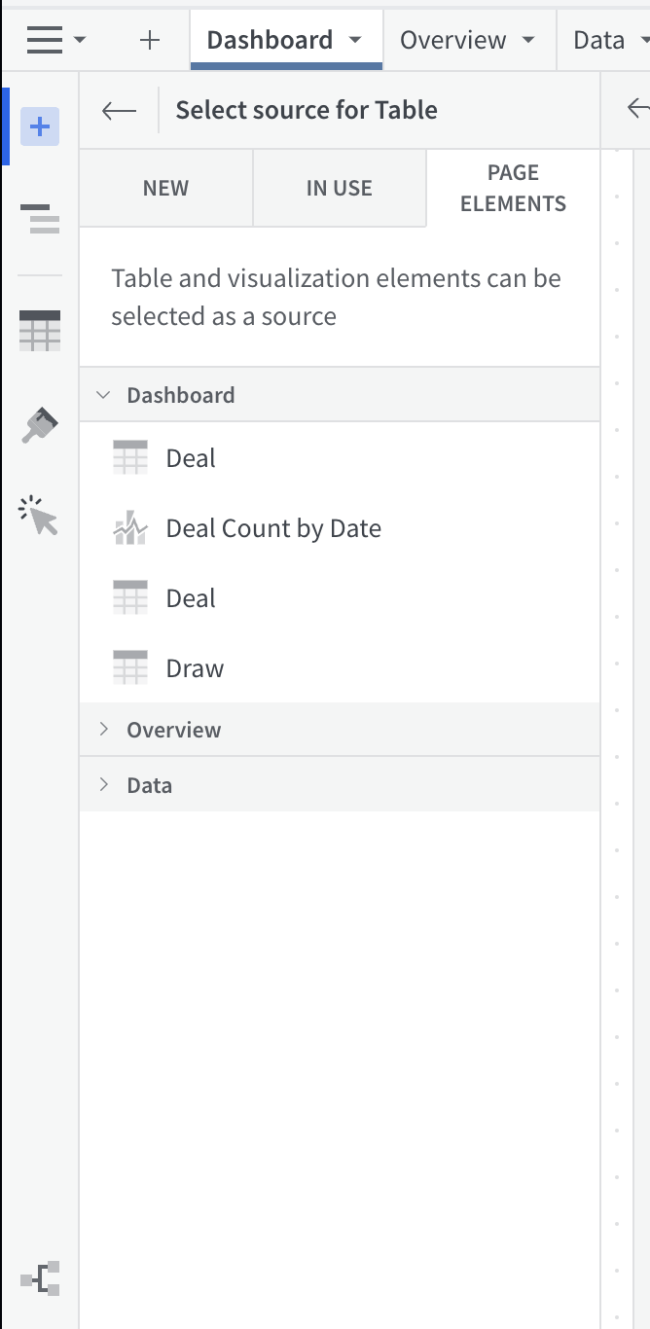
Create a data element from an existing element using the editor panel
This option creates an element from an existing element using the editor panel. To create an element directly from an element tile on a page's canvas, see Create a data element from an existing element tile on the canvas.
Before you start: This action is only available in edit mode. To begin editing, click Edit in the top right corner of the page.
| 1. | Open the workbook's ADD NEW panel. |
| 2. | Under DATA ELEMENTS, click to select your desired element type: TABLE, VIZ, or PIVOT TABLE. |
| 3. | It's time to select a data source. |
Open the PAGE ELEMENTS tab.
| 4. | Select an element. |
Note: Elements are organized by page.
Your new element will appear on the page, and the editor panel will open up to the specific element’s configuration view.
You may now interact with your new element using the editor panel, toolbar or the element itself.
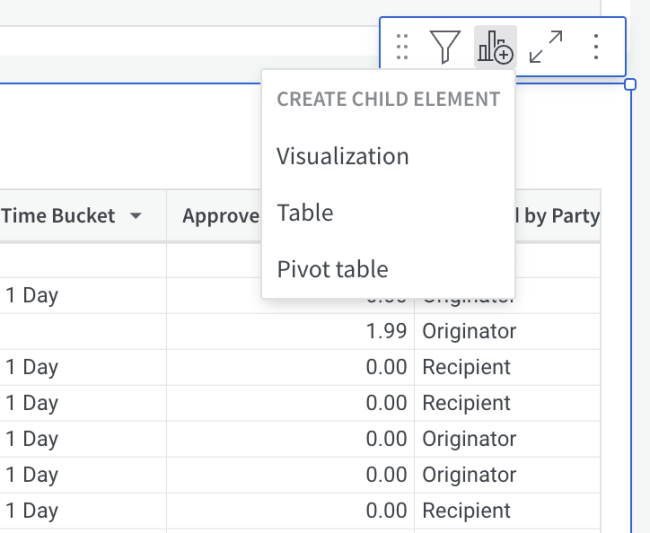
Create a data element from an existing element tile on the canvas
This option creates an element directly from an existing element tile on a page's canvas.
Before you start: This action is only available in edit mode. To begin editing, click Edit in the top right corner of the page.
| 1. | Hover over the element you want to use as a data source. |
| 2. | Click new element icon button. |
| 3. | Select an element type: Visualization, Table, or Pivot table. |
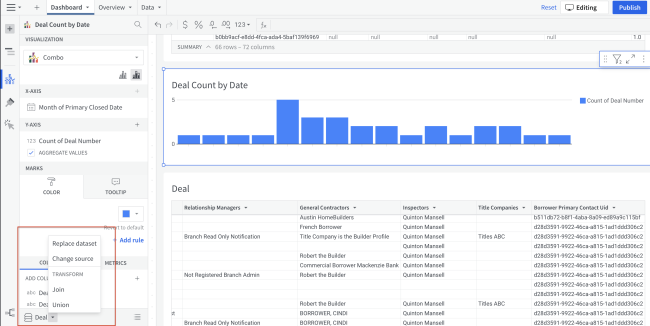
Identify and edit an element's data source
Before you start: This action is only available in edit mode. To begin editing, click Edit in the top right corner of the page.
An element's data source is listed at the bottom of the editor panel when the element is selected.
-
Click on the source name to access a full list of its columns, OR
-
Click on the vertical ••• menu to view, replace, or edit the source.