Intro to UI Elements
UI elements add additional context, styling, and navigation to workbook pages. They include buttons, dividers, images, spacers, embeds, and text.
Requirement
To create and edit UI elements, you must have a Creator license and the workbook must be saved to your team or My Documents folder.
For more information on Creator licenses, reach out to your Client Success Manager or client.success@getbuilt.com.
Create a UI Element
| 1. | If you are not already in Edit mode, click Edit. |
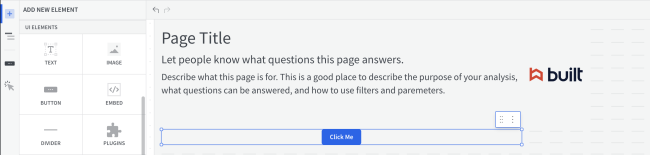
| 2. | In the editor panel's sidebar, click + ADD NEW. |
The ADD NEW panel opens.
| 3. | Under UI ELEMENTS, select one.The new element appears on the page. |
| 4. | Use your cursor to drag and drop the element anywhere on the page canvas. |
| 5. | Use the editor panel to configure your new element. |
Element Types
Text
Text UI elements allow you to add titles and captions to your workbook pages. You can choose the size, style, and font. The text can include dynamic content from formulas. For more information see Text Elements.
Image
Add an image to your workbook page by uploading or referencing a URL. Go to images settings to change how images fit within the dashboard container. You can reference control variables within the image embed URL to customize images on a per-dashboard basis.
Button
A button directs users to an external website URL or a different tab in the workbook. You can choose whether the link opens in a new browser tab, and you can optionally add control values. There are also customization options for button title and style.
Divider
A Horizontal divider visually partition elements or groups of elements on a page.