Text elements
Requirements
To add and edit text elements, you must have a creator license and the workbook must be saved to your team or My Documents folder.
Create a Text Element
Before you start: This action is only available in Edit mode. To begin editing, click Edit in the top right corner of the page; see Workbook lifecycle.
| 1. | Open the workbook's ADD NEW panel, accessible from the + button located in the sidebar on the left side of the page. |
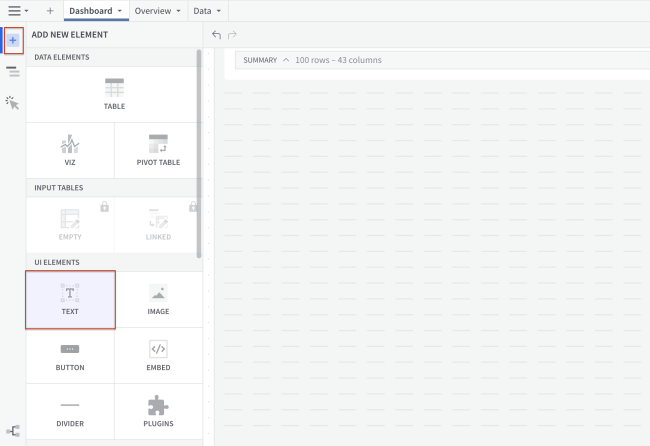
| 2. | On the ELEMENTS tab, under UI ELEMENTS, click TEXT. |
| 3. | Your new text element will appear selected on the page. |
-
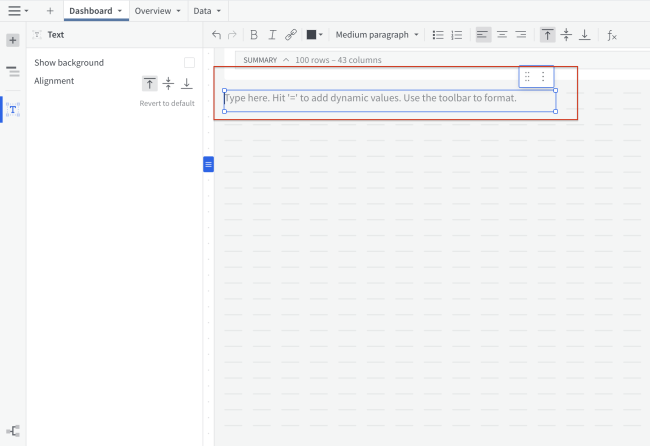
Begin typing to enter text.
-
Use the toolbar at the top of the page to add custom formatting or hyperlinks.
-
Use your cursor to drag and drop the element anywhere on the page canvas.
Apply Formatting to a Text Element
Before you start: This action is only available in Edit mode. To begin editing, click Edit in the top right corner of the page; see Workbook lifecycle.
| 1. | Click the element to select it. |
| 2. | Select the text you want to format. |
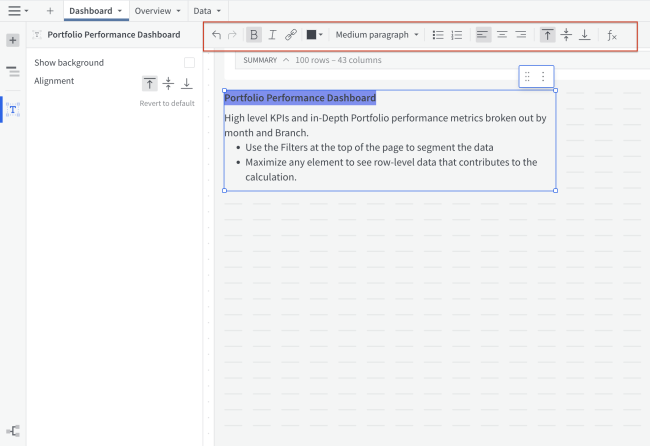
| 3. | Use the toolbar at the top of the page to select your format option(s). |
Add Dynamic Text Based on Your Data
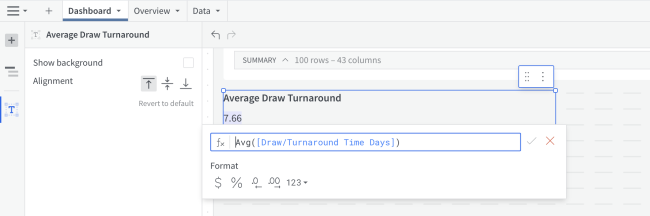
When editing a workbook, you can inject dynamic text into text elements. Dynamic text is text generated based on a formula. This is helpful if you want to display element headers or inline text that automatically updates based on your data.
Before you start: This action is only available in Edit mode. To begin editing, click Edit in the top right corner of the page; see Workbook lifecycle.
| 1. | Select your text element, and position your cursor where you would like to add dynamic text. |
| 2. | Hit = on your keyboard, |
or
Click the function ( ) button, located in the workbook's toolbar.
A formula bar will pop up over your text element.
| 3. | Type a formula, just as you would in the formula bar of any data element. |
| 4. | Hit Enter on your keyboard. |
| 5. | [optional] To apply formatting: |
-
Select your new dynamic text.
-
Choose a format option from the toolbar.
