Creating a custom role
You can create a custom role and assign that to a user.
Note: Ensure that full access is provided to the Role Management permissions.
To create a custom role, perform the following steps.
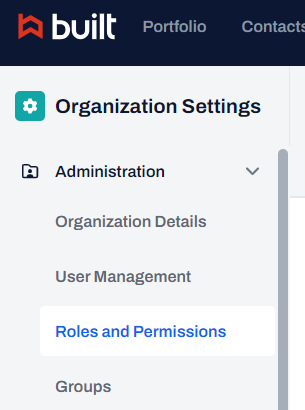
| 1. | At the top-right of the page, click Settings  . . |
| 2. | On the left navigation menu, click Roles and Permissions. |
| 3. | On the Roles and Permissions page, click + New Role. |

| 4. | In the New Role dialog box, enter the following information. |
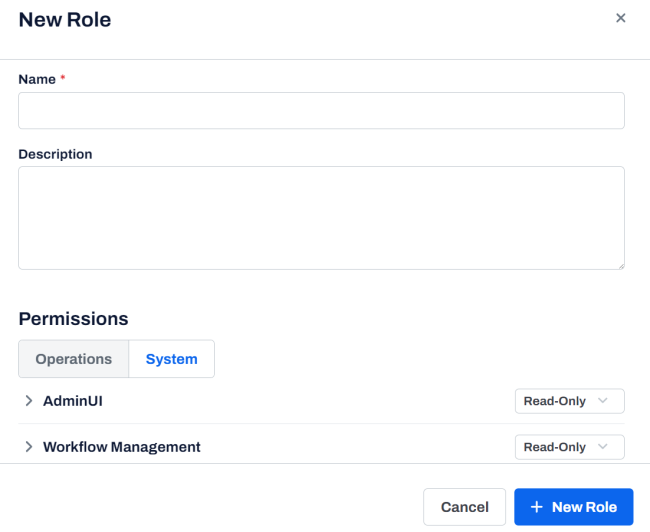
| i | In the Name and Description fields, enter a name and description for the role. |
Note:The Name field is mandatory.
| ii | In the Permissions section, set the required System and Operations permissions. |
Note:
• By default, the system permissions are displayed.
• To view the operations permissions, click the Operations tab.
- To set the permissions collectively, click the permissions drop-down. For example: Read-Only and select the required permission (No access, Read-only, or Full access).
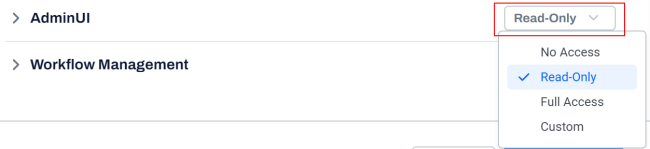 |
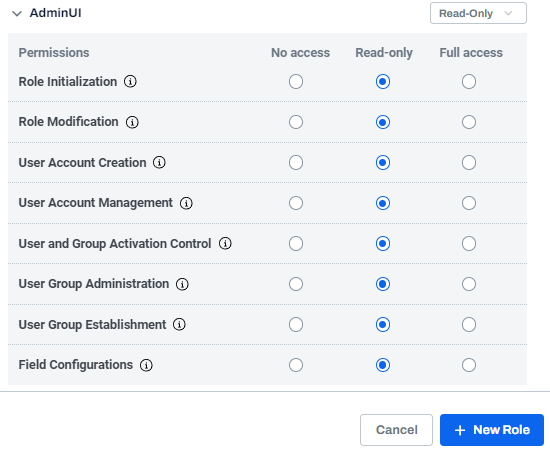
- To set the permissions individually, expand the required entity, for example: AdminUI . Alternatively, you can click the permissions drop-down and select Custom.
| The Admin UI permissions are displayed. |
|
| 5. | Click + New Role. |
A message is displayed indicating that the role is created successfully.
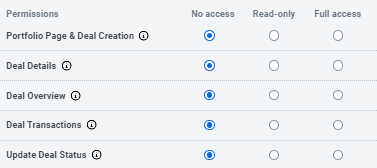
Full access
With this permission, users with full access can view, create, modify, delete, and manage the content, information, or feature. This includes all the privileges of the read access level, as well as the ability to alter data or configurations as required. Full access is typically given to administrators or those responsible for managing specific sections of the system. With full access permission to Portfolio page and Deal Creation, for example, users can create new deals from the Portfolio page, including setting the initial data within the Deal Details module.
| 1. | To provide all the permissions of a deal, select the Full access radio button, next to each permission. |
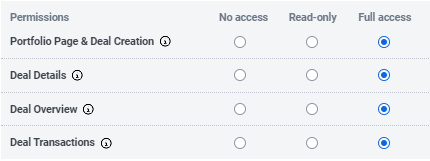
| 2. | Click Save. |
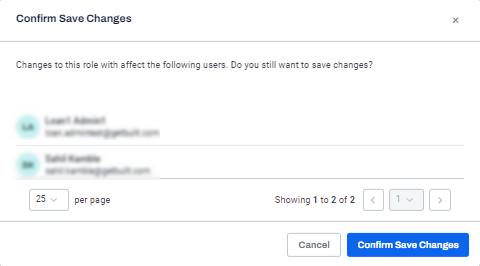
| 3. | On the Confirm Save Changes dialog box, click Confirm Save Changes. |
A message is displayed indicating that the role was changed successfully.
| 4. | At the top-left of the page, next to Built, the Portfolio tab is activated. |

| 5. | Click Portfolio. |
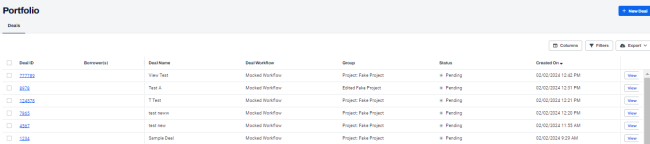
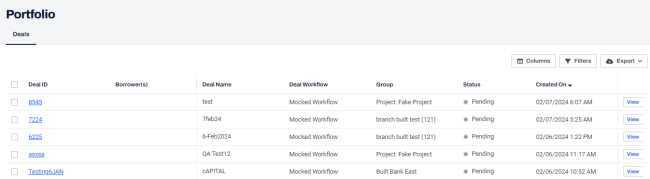
The user can view the Portfolio page with + New Deal button.
Note: To create a New Deal, please refer to Creating a new deal.
Read-only
This permission allows users to view the content or information but does not permit them to make any changes or modifications. You can read the data and observe settings or configurations, but you cannot add, delete, or alter any information. This is typically assigned when users need knowledge of the information or status but do not need to adjust it. With Read-only permission to the Portfolio page and Deal Creation, users can view the Portfolio page and access deals but cannot create a new deal. Also, the access to Edit button in the deal's settings page is disabled.
| 1. | To provide Read-only access to all the permissions of a deal, select the Read-only radio button, next to each permission. |
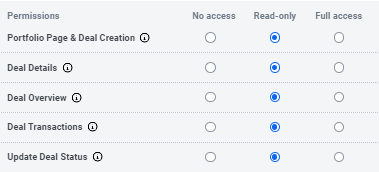
| 2. | Click Save. |
| 3. | On the Confirm Save Changes dialog box, click Confirm Save Changes. |
A message is displayed indicating that the role was changed successfully.
| 4. | At the top-left of the page, next to Built, the Portfolio tab is activated for the user who has read-only access. |
The user can access the Portfolio page, but the New Deal button is disabled.
No access
With this permission, the user cannot view or interact with the content, feature, or function in any way. It is as if the restricted area or feature does not exist in their user interface. This is typically assigned to users or roles that have no need to engage with a specific portion of the system. With no access permission to the Portfolio page or Deal Creation, users cannot access the Portfolio page, create deals, or access deals. When navigating manually using the URL to the Portfolio page and deals, it displays an access denied message.
| 1. | To remove/revoke all permissions of the deal, select the No access radio button, next to each permission. |
| 2. | Click Save. |
| 3. | On the Confirm Save Changes dialog box, click Confirm Save Changes. |
A message is displayed indicating that the role was changed successfully.
| 4. | At the top-left of the page, next to Built, the Portfolio tab is disabled for the user who has no access. |
