Scheduling reports for export
In Built, you can schedule reports and dashboards to be delivered via email or to your cloud storage based on certain conditions or frequencies.
You can schedule an export from:
-
Entire Workbooks
-
Visualizations (Graphs, KPIs, Charts, Maps)
| Parameter | Description |
|---|---|
| Select the required condition for sending report | |
| In data element | Select the elements that you want in the report |
| Check if | Select the condition to verify data in the report |
To schedule reports for export, perform the following steps:
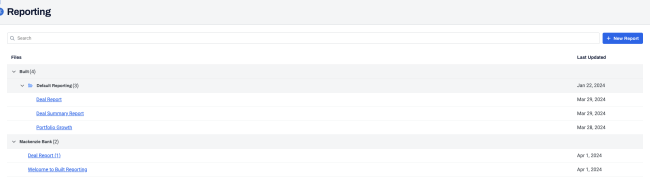
| 1. | At the top-left of the page, click Reporting. |

| 2. | On the Reporting page, in the Files section, click the report for which you want to schedule an export. |
| 3. | At the top-left of the page, click Menu  and select Schedule exports. and select Schedule exports. |
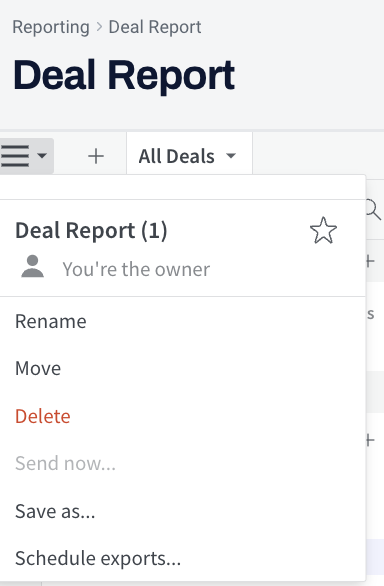
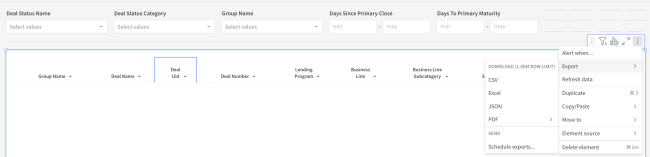
Alternatively, you can use vertical Ellipses  to schedule export of reports from individual elements such as Tables or Visualizations.
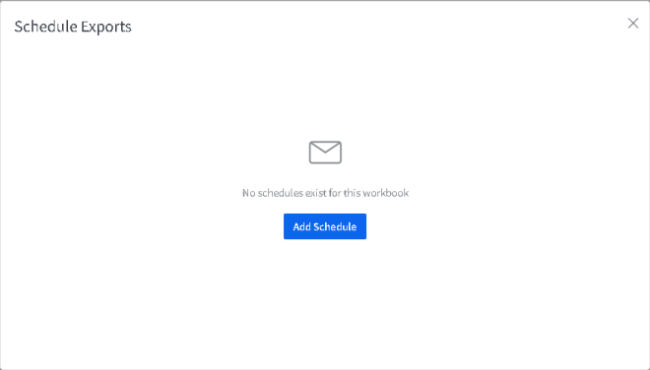
| 4. | On the Schedule Exports dialog box, click Add Schedule. |
| 5. | To set a condition, on the top-right, turn on the Condition toggle button. |
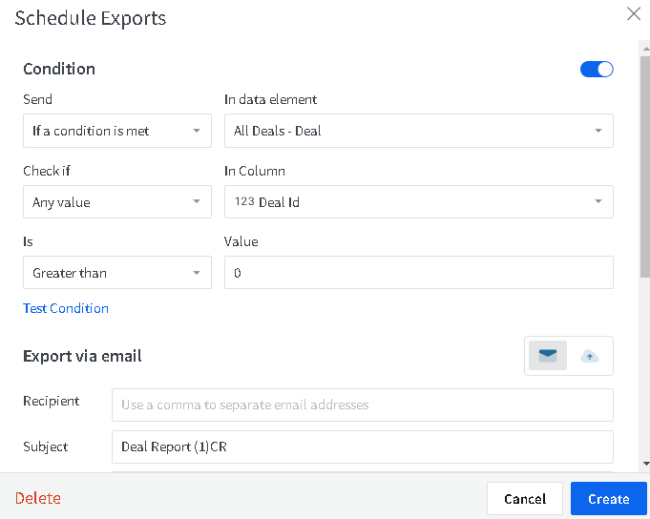
| 6. | In the Condition section, you can set conditions specific to the data that you want to export from the report. |
| Parameter | Description |
|---|---|
|
Send |
Select the required condition for sending report |
| In data element | Select the elements that you want in the report |
| Check if | Select the condition to verify data in the report |
|
In Column |
Select the column for which the data must be verified |
|
Is |
Select the verification condition |
|
Value |
Enter the required value for verification |
Once you have defined the conditions in which you'd like to schedule the report, click test Condition to see if "Data that meets condition exists" or "No Data meets current condition".
| 7. | You can export report using two options: |
-
Export via email
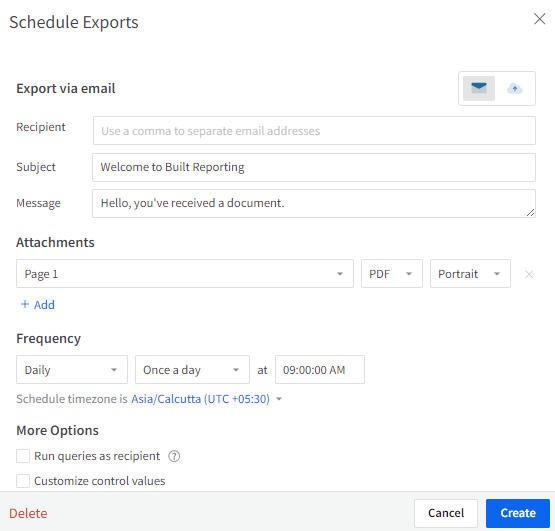
| i | In the Recipient field, enter the email address. This field is mandatory. |
| You can add multiple recipients separated by a comma. |
Note: Modify the Subject and Message fields.
| ii | In Attachments, you can select the elements from the report or dashboard, format of report, and layout of report, that you wish to export. |
Note: To add multiple attachments, click + Add.
| 8. | In Frequency, select the required frequency of exporting the report. |
- In the first drop-down list, select the frequency such as Daily, Monthly, Weekly, and Custom.
- In the second drop-down list, select the frequency such as Once a day, or Multiple times.
- In the third field, enter the time when you want the recipient to receive the email.
| 9. | In the Schedule timezone is drop-down, select the timezone and click Create. |
| iii | In More Options, select the required option. |
- Run queries as recipient: runs the database queries according to permissions and access of the indicated recipient. For example, if sending to a user assigned to a specific branch, the data sent will be scoped to that user's access level.
- Customize control values: determines which filters are applied to the report if required. For example, if you would like to filter a report to a specific Branch for the given recipient you'd select Group-Name and indicate which values you would like to filter for.
-
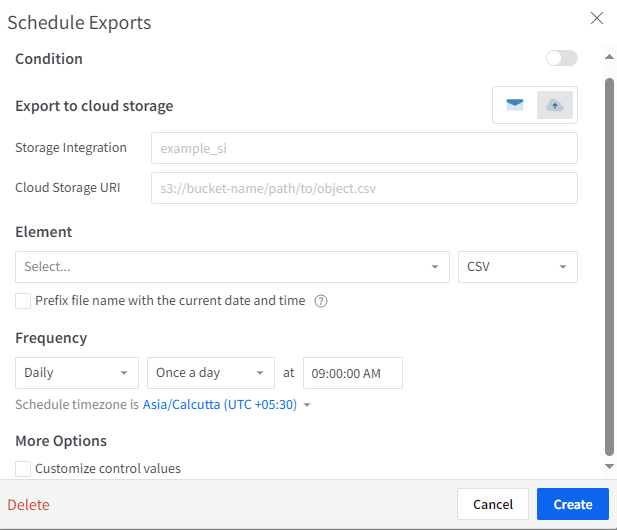
Export to cloud storage
| Perform the following steps: |
| i | In Storage Integration, enter the required information. This field is mandatory. |
| ii | In Cloud Storage URL, enter the required information. This field is mandatory. |
| iii | In Element, select the required elements, export format of the report and select the checkbox to include a prefix to the report name. |
| iv | In More Options, select Customize control values: to modify controls. |
| 10. | In Frequency, select the required frequency of exporting the report. |
- In the first drop-down list, select the frequency such as Daily, Monthly, Weekly, and Custom.
- In the second drop-down list, select the frequency such as Once a day, or Multiple times.
- In the third field, enter the time when you want the recipient to receive the email.
| 11. | In the Schedule timezone is drop-down, select the timezone and click Create. |
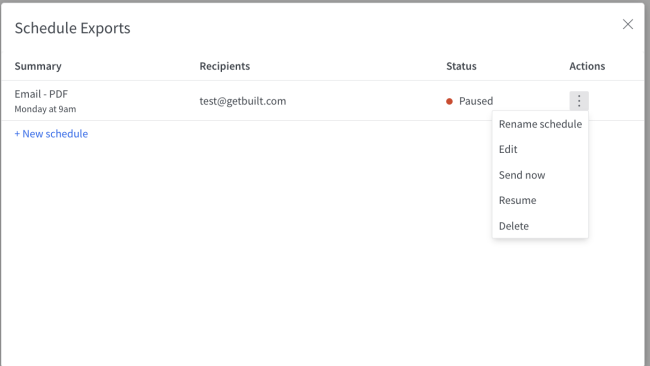
The Schedule Exports dialog box is displayed indicating the summary of scheduled reports. After you have scheduled your first export, you can manage your existing schedules by selecting Schedule exports... from the vertical ellipses.
Note: Reports are sent from reporting@getbuilt.com ensure that you allow messages from this email address and check your spam folder if you do not receive a report.