Creating a draw schedule
You can create a Draw Schedule manually or upload a .CSV file while creating a new deal. To create a deal, see Creating a deal.
Note: Ensure that:
• Full access permissions is provided to Deal Management:
• Portfolio Page
• Deal Creation
• Deal Details
• Deal Overview
• Draw Schedule.
This topic includes the following sections:
Creating a draw schedule manually
To create a draw schedule on a deal manually, perform the following steps.
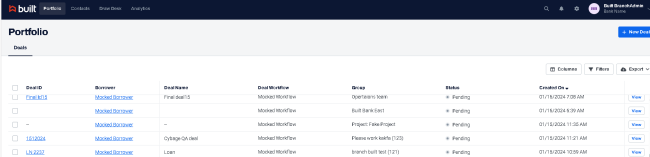
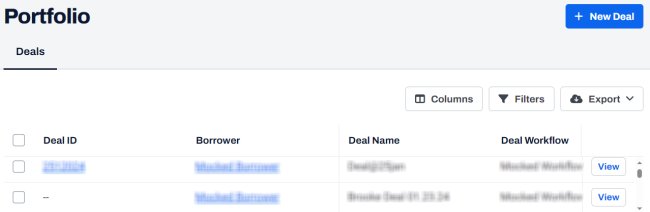
| 1. | At the top-left of the page, click Portfolio. |

| 2. | On the Portfolio page, click the Deal ID or View for the required deal. |
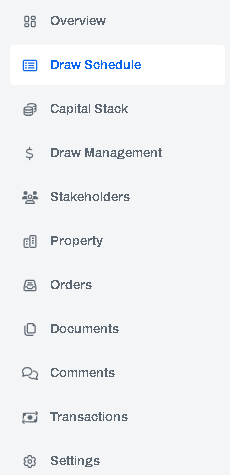
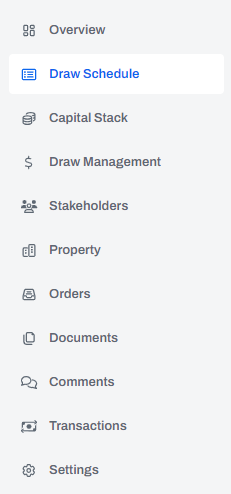
| 3. | On the left navigation menu, click Draw Schedule. |
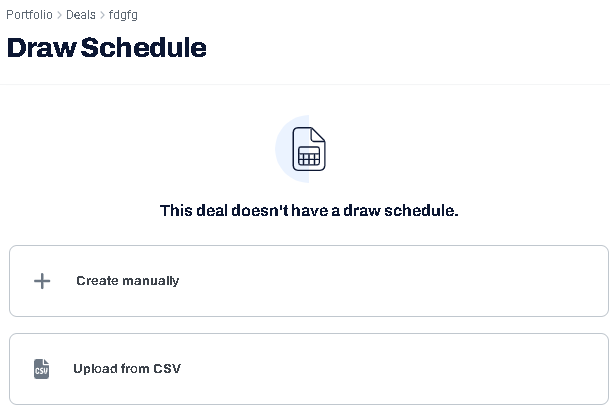
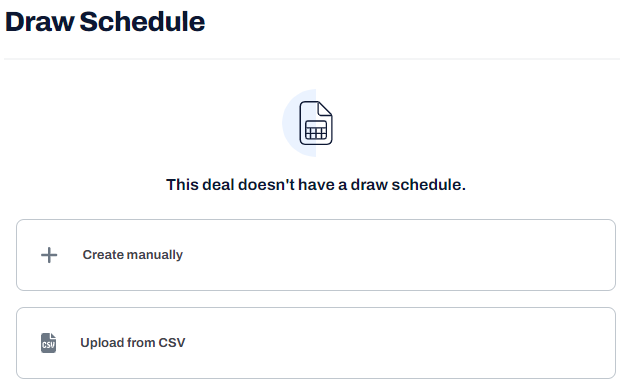
| 4. | On the Draw Schedule page, click + Create manually. |
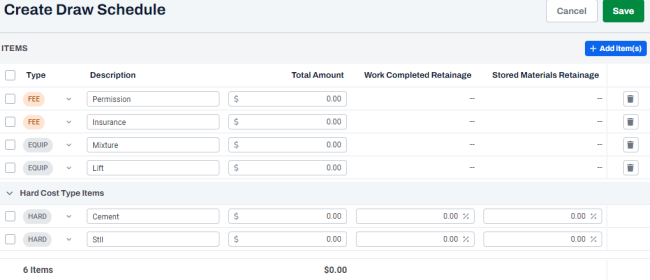
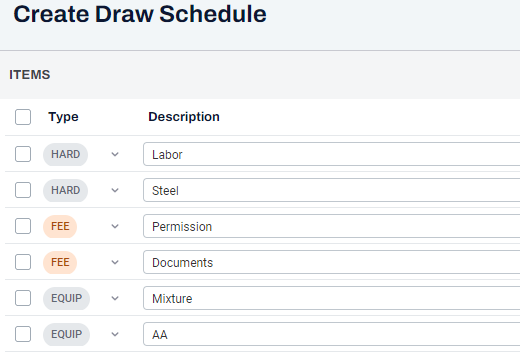
| 5. | On the Create Draw Schedule page, enter the following information and click Save. |
Note:
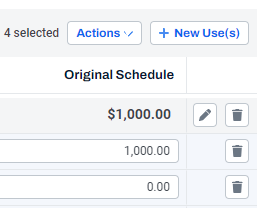
• To add multiple item rows, click + New Use(s).
• To create a group and add relevant item type in that group, see Creating a group.
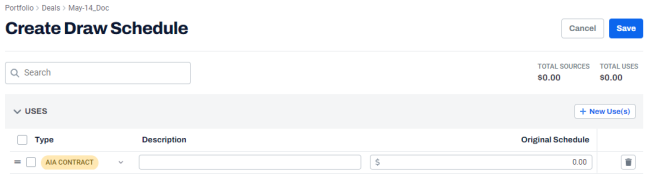
| Parameter | Description |
|---|---|
|
Type |
Type of cost such as Hard, Soft, and Contingency. |
| Description |
A description of the selected cost type. |
|
Original Schedule |
Amount payable for the item. |
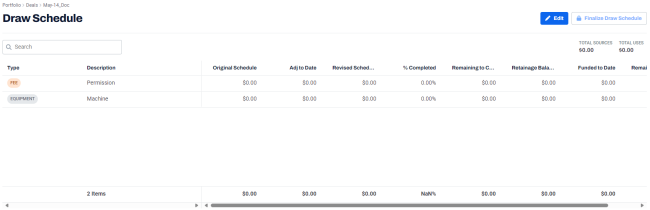
The Draw Schedule page is displayed with the details of the newly created draw schedule.
Creating a draw schedule using a CSV file
Lenders must download the template, add the draw schedule data, and then upload the completed file. You can modify and save the draw schedule details later.
Note: The template is available in the required draw schedule format.
To create a draw schedule using a CSV file, perform the following steps.
| 1. | At the top-left of the page, click Portfolio. |

| 2. | On the Portfolio page, click View or Deal ID for the deal. |
| 3. | On the left navigation menu, click Draw Schedule. |
| 4. | On the Draw Schedule page, click Upload from CSV. |
| 5. | On the Upload from CSV page, under STEP 1, click Download Template . |
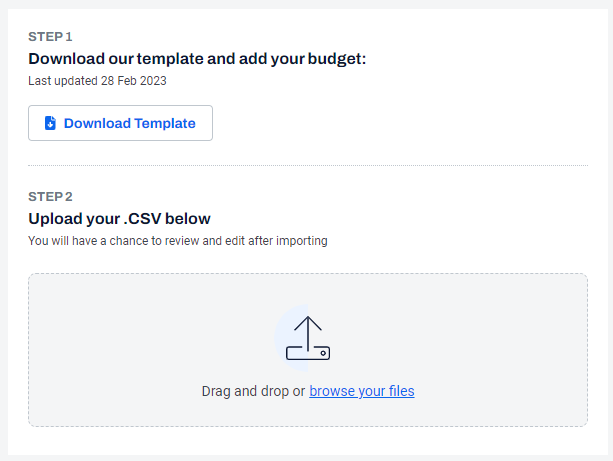
A CSV-formatted spreadsheet template is downloaded.
| 6. | From your computer, double-click to open the downloaded template. |
| 7. | Enter the following information and save the spreadsheet, ensuring that it is in csv format. |
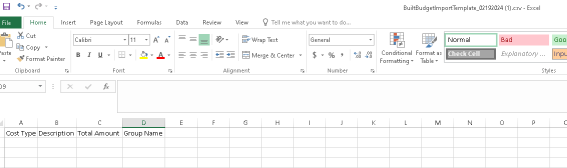
| Field | Description |
|---|---|
| Cost Type |
Type of cost, such as Hard, Soft, and Contingency, and so on. |
| Description | A description about the line item. |
| Total Amount | The total amount allocated to an item. |
|
Group Name |
The group name associated with the item in the draw schedule. This is helpful if you want to segment your draw schedule. |
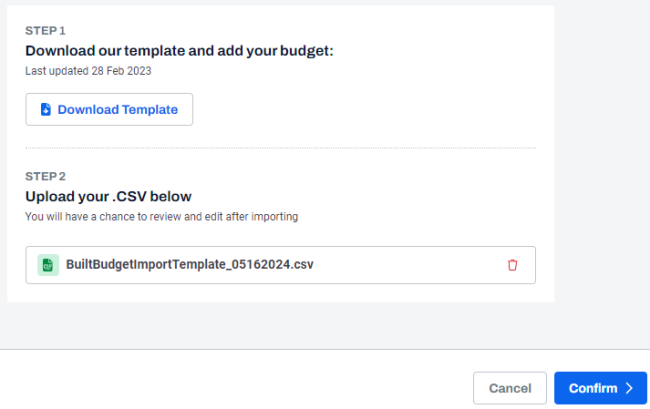
| 8. | On the Upload from CSVdialog box, under STEP 2, click Choose a File or click the drop box. |
| 9. | From your computer, select the spreadsheet that includes the completed draw schedule, and click Open. |
Note: To delete the uploaded file, click delete  .
.
| 10. | The file is displayed after it is successfully uploaded. Click Confirm. |
The columns from the template are displayed on the Create Draw Schedule page.

Note: To create a group and add relevant item type in that group, see Creating a group.
| 11. | On the Create Draw Schedule page, validate or enter the following information. |
| Field | Description |
|---|---|
|
Type |
Type of cost such as Hard, Soft, and Contingency. |
| Description | The description of the line item. |
|
Original Schedule |
The total amount allocated to an item. |
| 12. | After the information is reviewed and adjusted as required, click Save. |
The Draw Schedule page is displayed along with the created draw schedule according to the CSV template.
Creating a group
You can create a group and add relevant items in that group.
To create a group, perform the following steps.
| 1. | In the ITEMS section, select the items that you want to add to in a group. |
After selecting an item, the Actions option is displayed.
| 2. | Click Actions. |
Note: To delete the selected items, click  Delete Items.
| 3. | Hover over the  Add to group and click Add to group and click  Create group. Create group. |

Note: To remove items from group, click  Remove from group.
| 4. | On the Create Group dialog box, in the Group Name field, type the group name. |
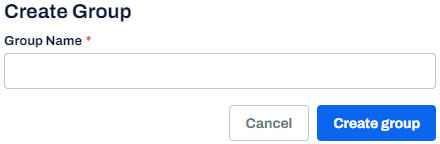
| 5. | Click Create group. |
The Create Draw Schedule page is displayed where selected items are displayed under created group.